After designing an awesome t-shirt, it’s time to show to the world. Facebook is the most popular social media in India which have the biggest audience for your product, let’s see how we can use this to sell our products easily.
Here are the few steps you need to follow to start selling t-shirts through Facebook.
- Create a Brand – Facebook Page
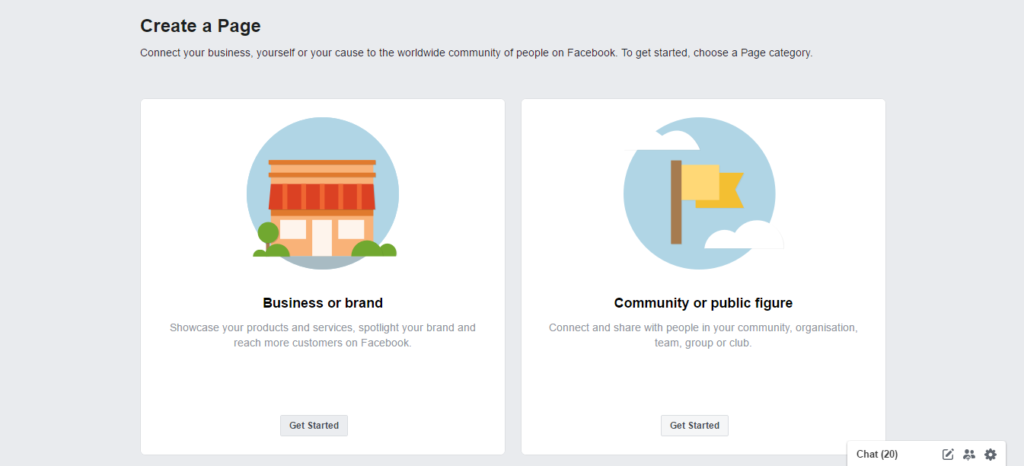
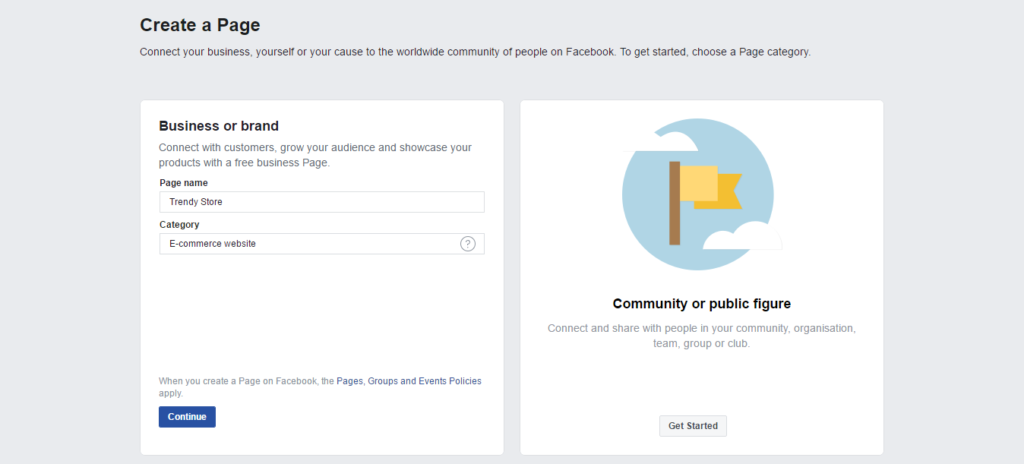
To promote your products through Facebook you need to create a Facebook page with your own brand name.
Now, something we like to tell you which can make help you to sell your t-shirts like a pie. Before creating a brand, think your awesome designed t-shirts belongs to whom? Who is your audience?
Click HERE to read a small post about this to know more.
Create your Facebook page according to your audience like t-shirts for Engineers, Doctors, Architect, Student, Couples or for any other community.
Give your brand name according to your audience category, like for Doctors you can give any name which is familiar in the doctor’s community. Don’t mix all t-shirt design under one brand name. You can create multiple FB pages for multiple communities.
- Add Shop Tab to Your Facebook Page
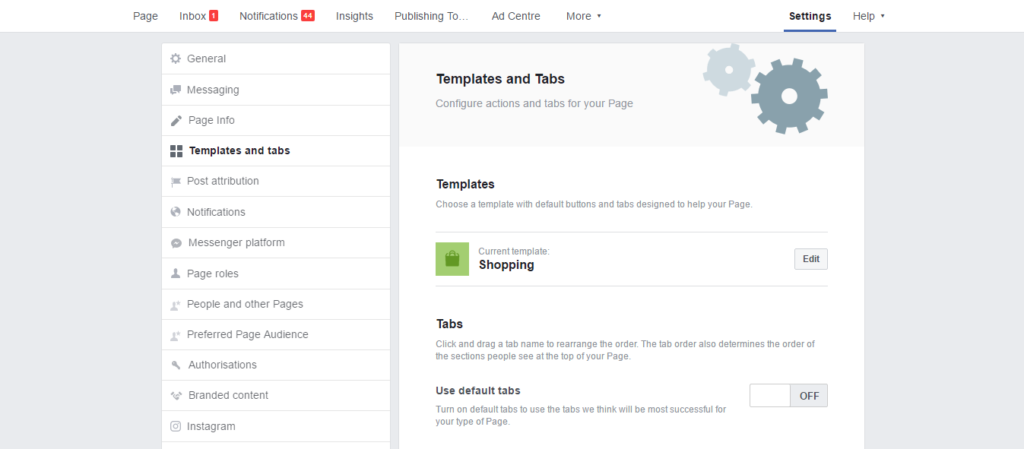
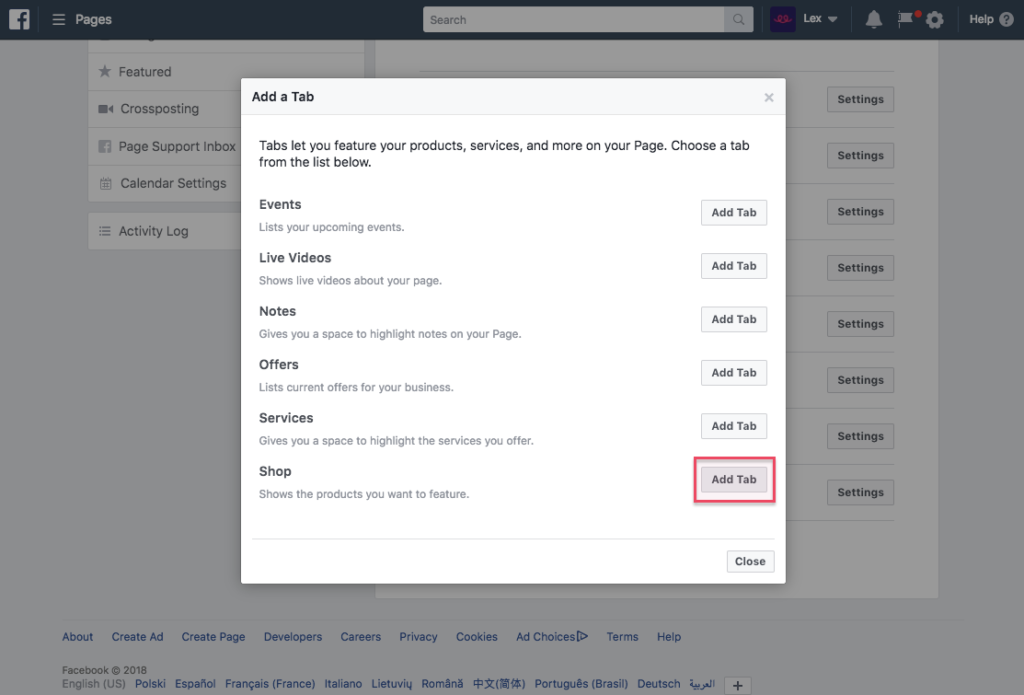
After creating your page, go to the Settings section of your page and Click on ‘Templates and tabs’ then scroll down and click ‘Add a Tab’ button.
- Redirect to Your Product Page
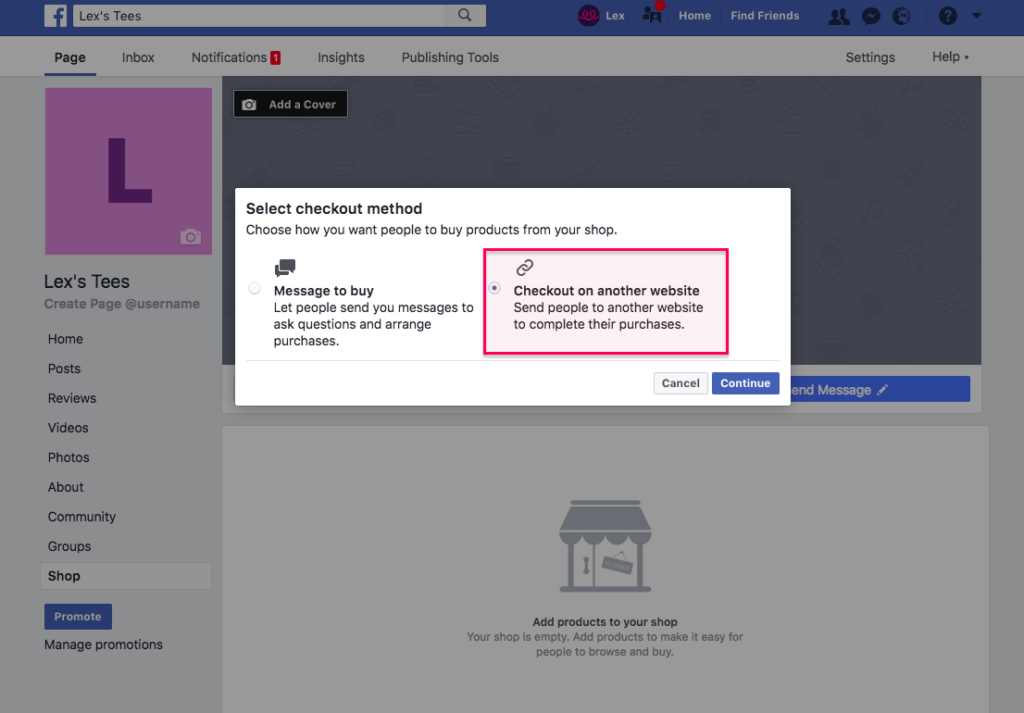
Now, a popup will appear and it will ask whether you want the customer to place an order by messaging you or directly to your website. You Choose ‘Checkout on another website’
- Add Products to Your Shop
Your Facebook Shop is almost completed and now start adding TeeShopper Products.
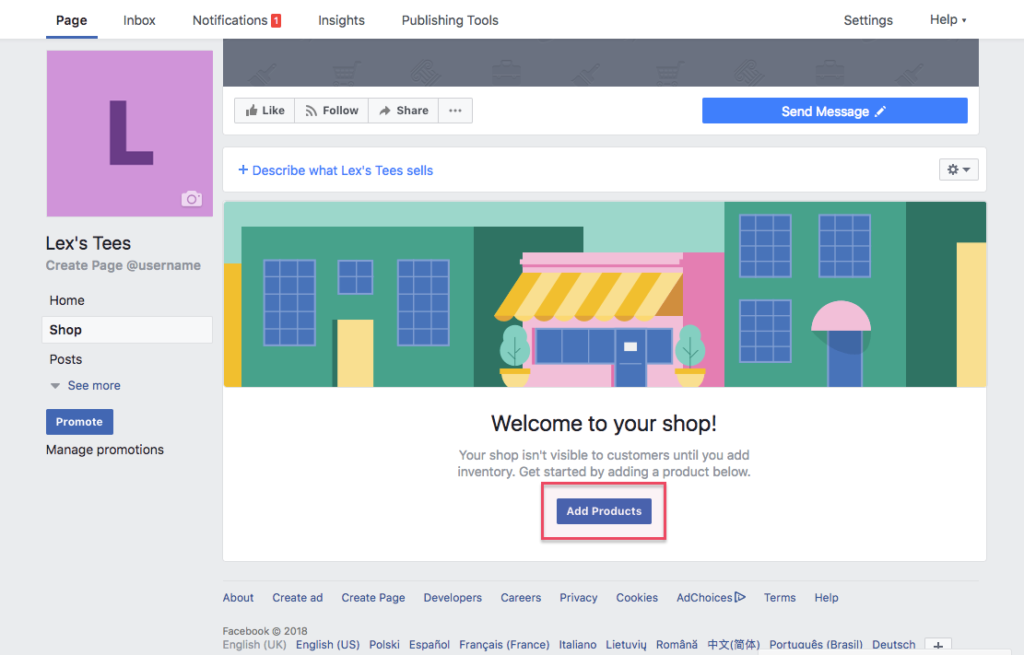
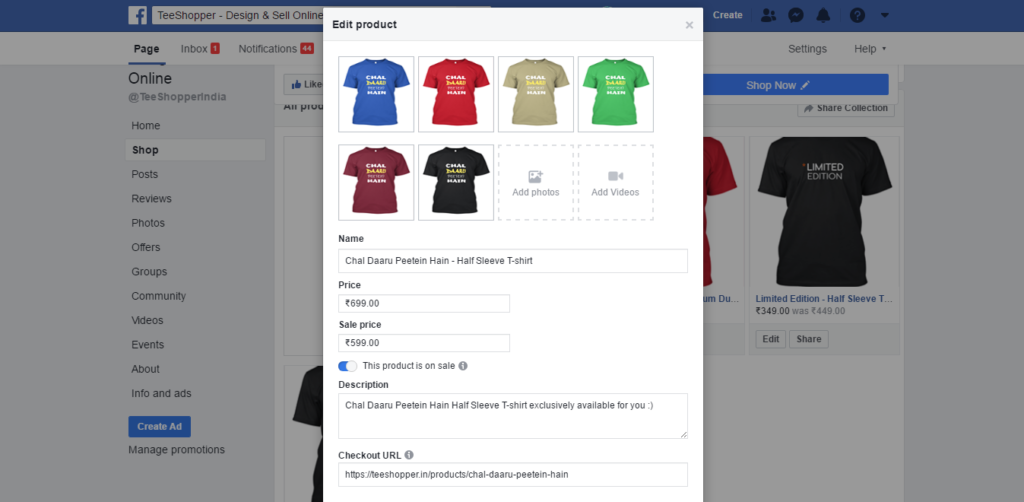
A popup will appear and it will ask basic details of your TeeShopper Product.
In Checkout URL, copy and paste the link of your product from TeeShopper Products section which you can see after login or URL box of your browser and hit save button.
Voila! You just published your First TeeShopper Product on your very own Facebook Shop.
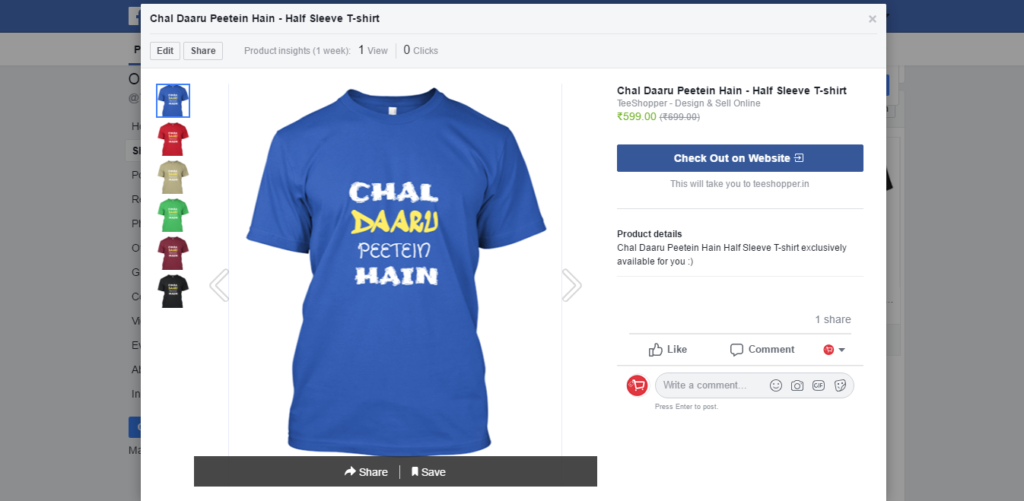
After clicking on ‘Check Out on Website’ Button, Facebook will redirect to your given TeeShopper Product Page Link for placing the order.
You can start now using Facebook paid Boost Option to gain traffic for your product and gain more sales or alternatively, you can share the products to your Facebook friends also for free with your own brand name now.
Tips :
- Upload a nice high-quality PNG logo for your Facebook Page
- Give your brand/page Name which can be remembered easily by your targeted audience
- Sometimes a cool post or Meme can get more engagement and likes to your page which can help you to reach more people
- Be active on Messenger
- Create Storefront on TeeShopper and give storefront link in General description and website link option of FB page.
Good Luck, if you have any questions you can ask below in comments.
